I love holidays!!! Any holiday... especially when a "just on the calendar" holiday coincides with a Holiday! 1st of May is a day of all working people but it is also My Dad's Birthday!
Even if I am far away from you on your holiday, daddy, I dedicate this cake to you! You used to like it when I baked it ....
Don't get puzzled about the ingredients, the result will surprise you. Some people ask if the cake has any even slight mayo taste: I may assure you - this cake has a CAKE taste!!!
INGREDIENTS:
Servings: 8-12
1 can concentrated sweet milk
 250g mayonnaise
4 eggs
1.5 glass sugar + 3-4tbs
2 glasses flour
1 teaspoon baking powder
800g sour cream / Greek Yogurt (10% fat)
+ sugar for the cream (to taste)
1 can peaches in syrup
50g almonds
cake gel / cake glue
First thing to do is to drain the sour cream or Greek yogurt. I used the yogurt as it is very difficult to find sour cream in Italy.
Note: Greek yogurt has almost same texture and even wins in fat percentage: instead of 18-20% of fat in sour cream, in yogurt there is only 10% of fat (you may try the lower fat versions of Greek yogurt but to my mind it will be too much, reducing the fat in yogut will result in more liquid texture).
250g mayonnaise
4 eggs
1.5 glass sugar + 3-4tbs
2 glasses flour
1 teaspoon baking powder
800g sour cream / Greek Yogurt (10% fat)
+ sugar for the cream (to taste)
1 can peaches in syrup
50g almonds
cake gel / cake glue
First thing to do is to drain the sour cream or Greek yogurt. I used the yogurt as it is very difficult to find sour cream in Italy.
Note: Greek yogurt has almost same texture and even wins in fat percentage: instead of 18-20% of fat in sour cream, in yogurt there is only 10% of fat (you may try the lower fat versions of Greek yogurt but to my mind it will be too much, reducing the fat in yogut will result in more liquid texture).

 1. Use a medium colander which you will cover with a clean kitchen towel. Then pour all the cream / yogurt inside and keep aside for 3-4 hours or the time necessary to bake and cool the cake layers. You will see how much whey it will drain....
And now we prepare the cake itself:
2. Whisk the eggs with 1.5 glass of sugar till it doubles in volume.
3. Add concentrated sweetened milk to the eggs and whisk it in.
1. Use a medium colander which you will cover with a clean kitchen towel. Then pour all the cream / yogurt inside and keep aside for 3-4 hours or the time necessary to bake and cool the cake layers. You will see how much whey it will drain....
And now we prepare the cake itself:
2. Whisk the eggs with 1.5 glass of sugar till it doubles in volume.
3. Add concentrated sweetened milk to the eggs and whisk it in.
4. Add mayo and mix well.
5. Sift flour with the baking powder and add it some by some to the egg mix and stir well.
This is how the batter will be when all the ingredients are in.
6. Heat the oven to 220C.
7. I used a silicon mould of 23cm in diameter but you may use any, in this case cut the circles out of the baking paper to fold the bottom of the mould. If you use a silicon mould just grease the bottom with some vegetable oil and clean it with a paper towel each time you bake.
8.To bake 5 layers pour 7 tbs of the batter to the mould and bake at 220C for 5 minutes or until it's brown on the top.
Note: To bake 6 layers, ust reduce the quantity of the tablespoons of the batter to 6 per each layer.
Note: This kind of batter raises a lot.
9. Cool each layer over the cake rack or the "net lid", the one that is use to cover the frying pans in order to avoid splashes of oil.
Let's prepare the cream:
10. Mix the drained sour cream / yogurt with 3-4 tbs of sugar, the cake is quite sweet itself so don't overdo with sugar!
And finally we assemble the cake:
11. Spread some cream over the first layer which you placed over a nice dish (the one that you will use to serve it)
12. Take the peaches out of their syrup and cut one in tiny pieces.
13. Spread the peach bit over the cream.
14. Cover with the second layer of the cake and repeat with the cream and peach.
15. Don't add any peach on the top of the cake but cover well with the cream.
16. Spread the rest of the cream over the sides of the cake.
17. Crush almonds into medium small grains.
18. Use the almond crush to cover the sides of the cake.
19. Decorate the top of the cake with the peaches as your fantasy suggests you better.
To make the peach roses:
- slice the peach as thin as possible and dry the slices with a paper towel,
- roll the first slice tightly and start envelope the other slices around,
- place the rose on the cutting board with the edges of the peach around to fix the shape,
- fix the rose with a cake transparent gelatine used to frost the cakes,
- remove the peach edges from the rose and transfer it onto the cake.
Note: You may ask any florist for some real rose leaves (in any case they through them away) or do I did and use the lemon leaves or any other that are not toxic.
 Note: To use the leaves, wash them carefully and clean with a paper towel soaked in vegetable oil. This will clean the leaves better and will render them more shining and attractive.
ENJOY !!!
In this recipe I used the part of roasted chicken we had for dinner but it is also possible to grill or steam some chicken breast.
This salad may be served as an appetizer or as a main dish for a light lunch.
INGREDIENTS:
Servings: 2
1 chicken breast / 2 thighs and drumsticks
 or 200-250g chicken breast (to grill or steam)
1 green apple
1/2 small onion
1 tbs mayonnaise
2 tbs plain thick yogurt / sour cream
1/2tbs Dijon mustard
1/2tbs Worcester sauce (optional)
salt
lettuce leaves for decoration
1. If your chicken is not cooked, then grill or fry or steam it according to your taste.
2. Cut chicken into small sticks.
or 200-250g chicken breast (to grill or steam)
1 green apple
1/2 small onion
1 tbs mayonnaise
2 tbs plain thick yogurt / sour cream
1/2tbs Dijon mustard
1/2tbs Worcester sauce (optional)
salt
lettuce leaves for decoration
1. If your chicken is not cooked, then grill or fry or steam it according to your taste.
2. Cut chicken into small sticks.
 3. Cut onion in very thin slices.
4. Sprinkle onion with some lemon juice to reduce the bitterness of the onion.
5. Peel half an apple and remove the seeds.
6. Cut the apple into small triangles.
7. Mix together mayo, yogurt and mustard.
Note: Add some Worcester sauce if you like it...
8. Use a small bowl per serving, dress the bowl with some lettuce leaves.
3. Cut onion in very thin slices.
4. Sprinkle onion with some lemon juice to reduce the bitterness of the onion.
5. Peel half an apple and remove the seeds.
6. Cut the apple into small triangles.
7. Mix together mayo, yogurt and mustard.
Note: Add some Worcester sauce if you like it...
8. Use a small bowl per serving, dress the bowl with some lettuce leaves.
 9. In a separate bowl mix together chicken, apple, onion and season with the sauce and some salt.
10. Transfer the salad into the small bowls with lettuce leaves and serve.
9. In a separate bowl mix together chicken, apple, onion and season with the sauce and some salt.
10. Transfer the salad into the small bowls with lettuce leaves and serve.
ENJOY !!!
I had some fish fillet leftovers from sushi cooking so this dish came out really handy using these small pieces of salmon and tuna.
You may serve it as main dish or as a condiment for short types of pasta.
INGREDIENTS:
Servings: 2
~100g tuna fillet
 ~100g salmon fillet
~100g shrimps
200g green peas
1/2 medium onion
2 garlic cloves
salt
EVO oil
1. Chop onion into pieces.
2. Lay a large knife blade flat over the garlic cloves and strongly press it with the palm of the other hand.
Note: You don't need to peel garlic to do so.
Note: This way garlic will release it's flavour slowly and it won't prevail over the other flavours.
3. Cut salmon and tuna into 1-1.5cm cubes.
~100g salmon fillet
~100g shrimps
200g green peas
1/2 medium onion
2 garlic cloves
salt
EVO oil
1. Chop onion into pieces.
2. Lay a large knife blade flat over the garlic cloves and strongly press it with the palm of the other hand.
Note: You don't need to peel garlic to do so.
Note: This way garlic will release it's flavour slowly and it won't prevail over the other flavours.
3. Cut salmon and tuna into 1-1.5cm cubes.
 4. Heat 3-4 tbs of Olive oil in a frying pan and add garlic cloves and chopped onion.
5. Cook over the medium heat till onion gets transparent.
4. Heat 3-4 tbs of Olive oil in a frying pan and add garlic cloves and chopped onion.
5. Cook over the medium heat till onion gets transparent.
 6. Add tuna and salmon and stir carefully, keep cooking over the medium heat till the fish gets lighter in colour.
7. Add green peas and cook for 5 minutes, still over the medium heat.
8. At the end add shrimps and salt the dish to your taste.
Note: Shrimps are very fast to cook so don't cook too much, couple of minutes will be enough.
9. You may sprinkle the dish with some pepper or chilli if you like it, but I left it's natural flavour to delight my palate...
6. Add tuna and salmon and stir carefully, keep cooking over the medium heat till the fish gets lighter in colour.
7. Add green peas and cook for 5 minutes, still over the medium heat.
8. At the end add shrimps and salt the dish to your taste.
Note: Shrimps are very fast to cook so don't cook too much, couple of minutes will be enough.
9. You may sprinkle the dish with some pepper or chilli if you like it, but I left it's natural flavour to delight my palate...
ENJOY !!!
If you tried Royce' Nama Chocolate at least once, you will never forget it, even if you are not a chocolate eater like me...
It has such a smooth and creamy taste and it litterally melts in your mouth in a second, leaving you in a perfect bliss....
Nama means "fresh" or "raw" in Japanese, so this chocolate is kept in the fridge.
If in your country Royce' chocolate is not easy to find as here in Italy, forget of running around the city: you may prepare Nama chocolate at home!!!
INGREDIENTS:
Servings: 18-24 chocolates
 300g dark bitter chocolate 50% cocoa min.
150ml whipping cream 35% fat min.
25g butter
2-3tbs liqueur
1. Cut the chocolate bar into small pieces with the use of a sharp knife (better a wide one).
300g dark bitter chocolate 50% cocoa min.
150ml whipping cream 35% fat min.
25g butter
2-3tbs liqueur
1. Cut the chocolate bar into small pieces with the use of a sharp knife (better a wide one).
 2. Prepare a pot for double boiling, you may need it just for a couple of minutes, so don't boil a lot of water.
3. Heat the cream in the microwave or anyhow: it should be very hot but shouldn't boil.
4. Pour the cream to the bowl with the chocolate bits and stir carefully with a silicon or plastic scoop.
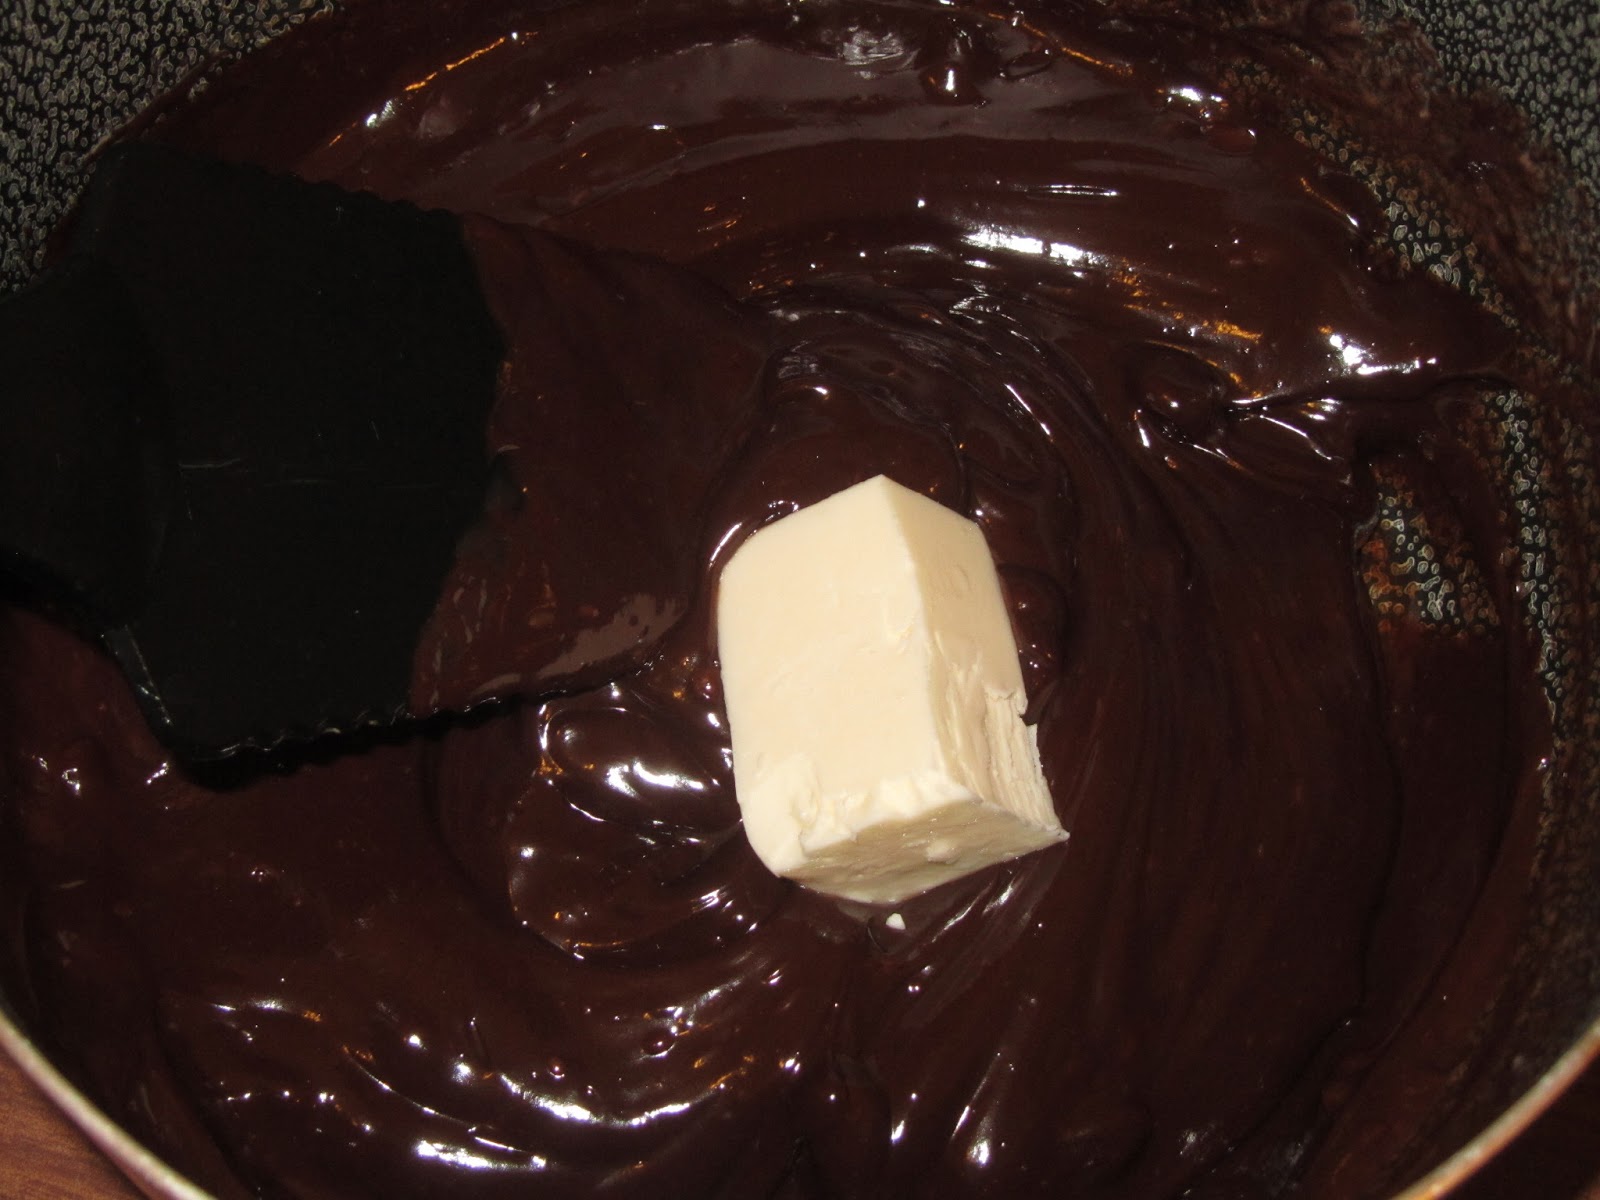
5. Add butter and continue stirring.
6. At this point you may need to use the double boiling for a couple of minutes to finish the chocolate melting.
Note: Stir constantly!!!
Note: Don't overheat the chocolate ganache as it may split.... Remove the bowl from double boiling if you see that the mix is getting too hot or starts splitting.
7. Stir your favourite liqueur in the chocolate ganache.
8. Prepare a small tray or even a plastic container, which inner side you will carefully dress with the plasic film. I used 10x18cm plastic container for the amount of the chocolate ganache I prepared.
Note: The size of the tray will result in the thickness of the chocolates. With the tray size I used the chocolates resulted in being 2cm thick - perfect!
7. Pour chocolate ganache into the lined tray and level it well.
8. Refrigerate the chocolate for 1.5 hour.
9. Remove the tray from the fridge and pooling the sides of the plastic film outside, remove the chocolate out of the tray.
2. Prepare a pot for double boiling, you may need it just for a couple of minutes, so don't boil a lot of water.
3. Heat the cream in the microwave or anyhow: it should be very hot but shouldn't boil.
4. Pour the cream to the bowl with the chocolate bits and stir carefully with a silicon or plastic scoop.
5. Add butter and continue stirring.
6. At this point you may need to use the double boiling for a couple of minutes to finish the chocolate melting.
Note: Stir constantly!!!
Note: Don't overheat the chocolate ganache as it may split.... Remove the bowl from double boiling if you see that the mix is getting too hot or starts splitting.
7. Stir your favourite liqueur in the chocolate ganache.
8. Prepare a small tray or even a plastic container, which inner side you will carefully dress with the plasic film. I used 10x18cm plastic container for the amount of the chocolate ganache I prepared.
Note: The size of the tray will result in the thickness of the chocolates. With the tray size I used the chocolates resulted in being 2cm thick - perfect!
7. Pour chocolate ganache into the lined tray and level it well.
8. Refrigerate the chocolate for 1.5 hour.
9. Remove the tray from the fridge and pooling the sides of the plastic film outside, remove the chocolate out of the tray.
 10. Place the chocolate bar on a sheet of oven paper to avoid sticking it to the cutting board.
11. Use a warm and dry knife to cut the perfect size chocolates.
Note: You may keep the tap hot water running and heat your knife each time you cut the chocolate, you also need to dry the knife carefully every time you heat it under the hot water.
Note: I cut the chocolate bar into 18 chocolates but it's also enough to cut into 24 pieces.
10. Place the chocolate bar on a sheet of oven paper to avoid sticking it to the cutting board.
11. Use a warm and dry knife to cut the perfect size chocolates.
Note: You may keep the tap hot water running and heat your knife each time you cut the chocolate, you also need to dry the knife carefully every time you heat it under the hot water.
Note: I cut the chocolate bar into 18 chocolates but it's also enough to cut into 24 pieces.
 12. Sift the chocolate with the cocoa powder over, turn them with the use of a wide knife and sift the cocoa powder over again.
13. If you want to coat some chocolates with the crushed nuts (almonds, walnuts,...), separate the chocolates with a paper sheet before sifting cocoa powder over.
Note: As the original Royce' Nama chocolates are sold in boxes I also used a nice box for presentation. This way the chocolates become a precious gift to your beloved or your friends....
15. Refrigerate your chocolate to store them if after the tea time you have any left....
12. Sift the chocolate with the cocoa powder over, turn them with the use of a wide knife and sift the cocoa powder over again.
13. If you want to coat some chocolates with the crushed nuts (almonds, walnuts,...), separate the chocolates with a paper sheet before sifting cocoa powder over.
Note: As the original Royce' Nama chocolates are sold in boxes I also used a nice box for presentation. This way the chocolates become a precious gift to your beloved or your friends....
15. Refrigerate your chocolate to store them if after the tea time you have any left....
Itadakimasu!!!

 250g mayonnaise
 1. Use a medium colander which you will cover with a clean kitchen towel. Then pour all the cream / yogurt inside and keep aside for 3-4 hours or the time necessary to bake and cool the cake layers. You will see how much whey it will drain....


 Note: To use the leaves, wash them carefully and clean with a paper towel soaked in vegetable oil. This will clean the leaves better and will render them more shining and attractive.